- Establishing your Brand Identity
- Building Your Shopify Store
- BONUS CONTENT: Building with the Most Popular Themes
- BONUS CONTENT: How Does Shopify Shipping Work?
- BONUS CONTENT: Ecommerce Website Comparison
The biggest challenge when starting an online business is often figuring out how to get your products in front of potential customers and the most efficient way to do this in today’s modern world is through an online store. There are a number of different platforms you can use to create your store, but most entrepreneurs choose Shopify.
In a nutshell, Shopify is a platform that allows businesses of all sizes to create a digital store and sell to anyone across the world.
Get an in-depth look into how we created a Shopify store from scratch for one of our concept brands, Stand Out Tribes. This guide will show you how to sign up for Shopify, choose and customize a theme, add products, set up payments, shipping, and more.
Let’s get started!
Why do many business owners use Shopify?
There are plenty of eCommerce platforms out there to choose from, so why does Shopify stand out? The truth is, there isn’t anyone perfect eCommerce platform for everyone. But Shopify is a popular choice because it checks a lot of boxes that are important for business owners:
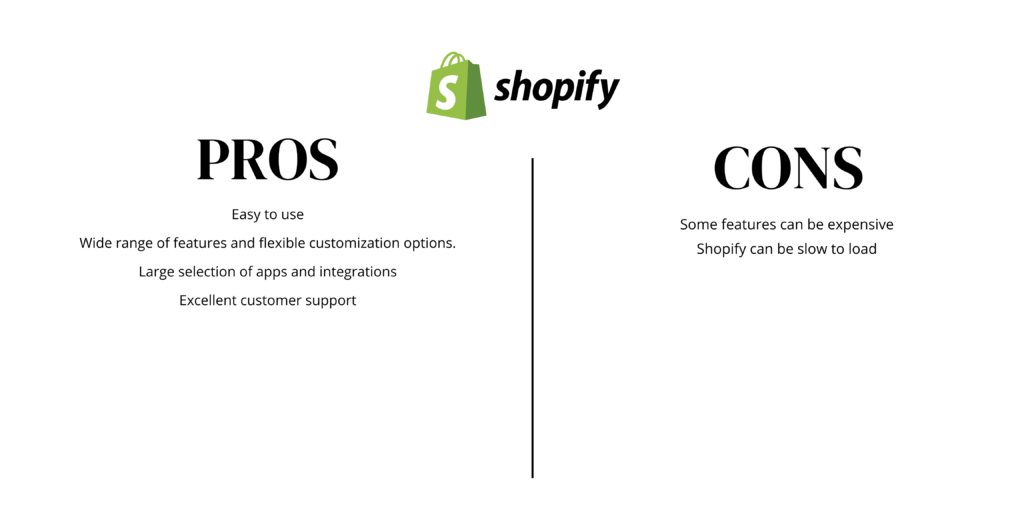
1. It’s easy to use.
2. It integrates with plenty of other apps and services.
3. It offers a wide range of features.
4. It has great 24/7 customer support.
5. It is relatively affordable.
As mentioned earlier, there are also some things you need to be aware of before using Shopify, such as the transaction fees and the fact that you’re responsible for your own hosting and security. But overall, Shopify is a great choice for business owners who want an easy-to-use platform with plenty of features and integrations.
Purchasing your Shopify Plan
How much does it cost?
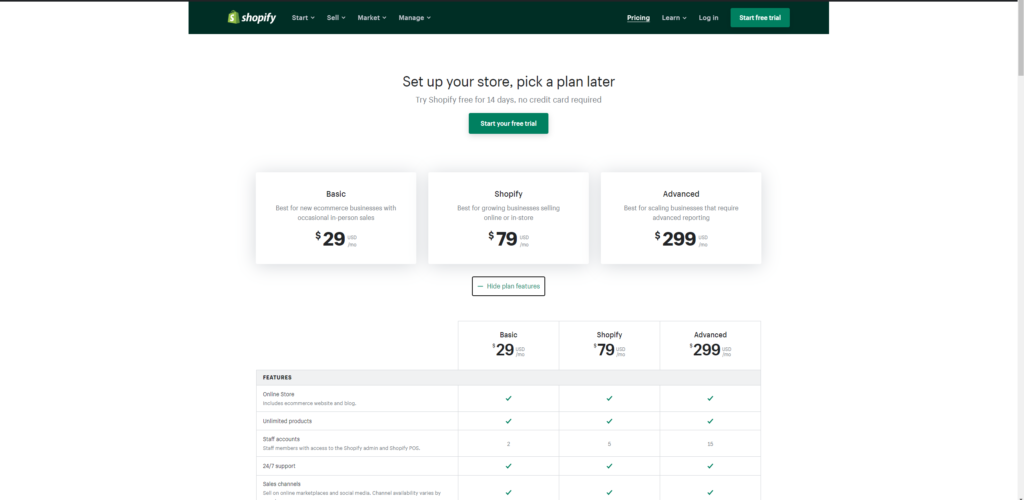
Shopify has four different tiers of pricing: Basic Shopify, Shopify, Advanced Shopify, and Shopify+. The main difference between the plans is the number of features and support you get.
The “Basic Shopify” plan starts at $29/month and is a great choice for small businesses just getting started with e-commerce.
The “Shopify” plan starts at $79/month and is a good choice for businesses that are ready to scale their online sales.
The “Advanced Shopify” plan starts at $299/month and is the best choice for businesses that need advanced features and support.
Lastly, their biggest plan Shopify+ starts at $2000/month and is designed for high-volume businesses.
Is Shopify Plus worth it?
The truth is, it depends on your business needs. Shopify Plus is the most expensive plan at $2000/month, but it also offers the most features and support. If you’re a high-volume business, then Shopify Plus is worth the investment. But if you’re just starting out or your business is small to medium-sized, then the other plans will be more than enough.
Once you’ve decided which Shopify plan is right for you, it’s time to purchase your plan. You can do this by visiting their pricing page and clicking on your desired plan.
Establishing your Brand Identity
Before moving on to building your store, ensure that you have a complete and solid plan for your brand. This means having a clear understanding of what your brand is, what it represents, and what makes it unique.
“What important factors should I consider?“
Building a brand is more than just about what you offer. It’s important for businesses like yours to have an identity that builds loyalty among customers! A unique and lasting impression can make all of those other things seem less daunting when it comes time to pick out which company they want to do business with.
Your brand is more than just your logo or the design of your website. It’s the feeling that people get when they interact with your business.
Your target audience
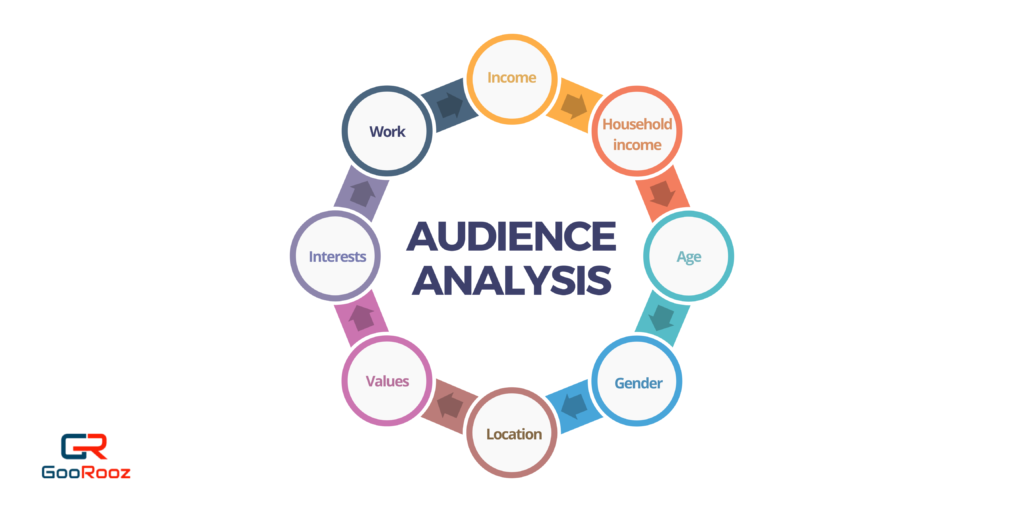
Knowing who you’re trying to reach is the first step in crafting content that will resonate with them. Understanding your customer’s needs will impact everything from the colors you use on your website to the tone of your social media posts.
A time-efficient way to get to know your target audience is by developing buyer personas. These are fictional representations of your ideal customer based on data you’ve collected, such as age, gender, interests, and pain points.
Here’s a quick overview of how we developed buyer personas for Stand Out Tribes:
1. We start with data, such as surveys, interviews, and Google Analytics.
2. We use that data to create profiles of our ideal customers.
3. We give each persona a name, photo, and detailed information about their lives and interests.
4. Finally, we develop marketing campaigns specifically for each persona.
This process might seem like a lot of work, but it’s worth it! Once you have a clear understanding of who you’re talking to, you can craft content that speaks directly to their needs.
Your mission, vision, and value statement
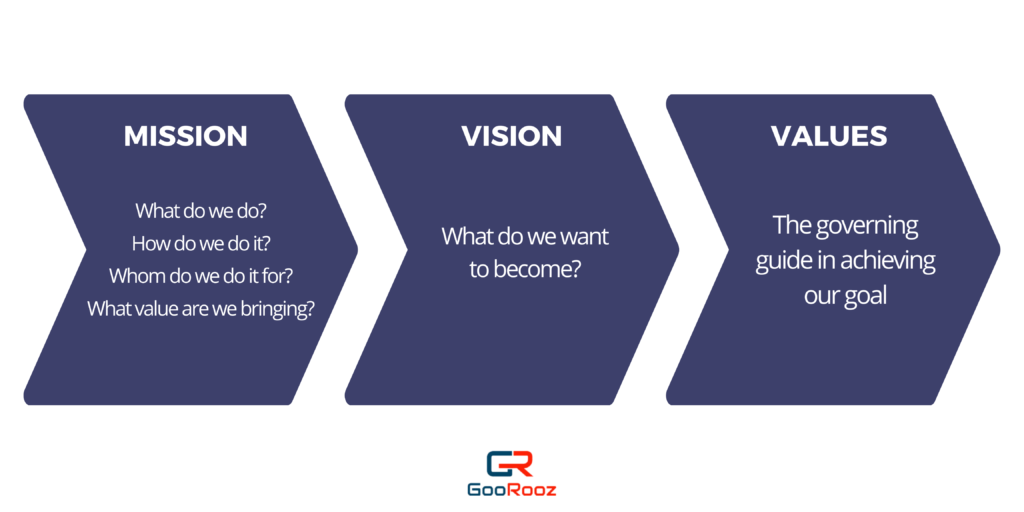
Every business has a unique purpose. The underlying thing we’ve noticed is how great Shopify stores are able to reflect this purpose in the store’s design and functionality. Telling your customers what you stand for builds trust and creates transparency between you and your shoppers.
An easy way to do this is by writing a mission or vision statement. This is a short, concise sentence that defines what your business does and why it exists.
Your Unique Selling Proposition
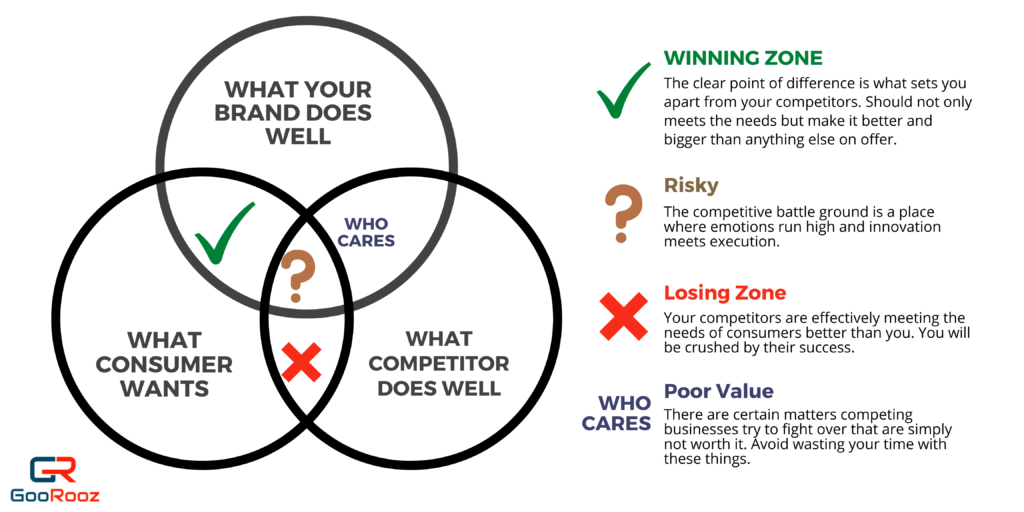
Think about how you can create something new and better than what is currently being offered in your market or industry. It’s not enough to be different from the competition; it also has to result in an improved experience for customers.
Building Your Shopify Store
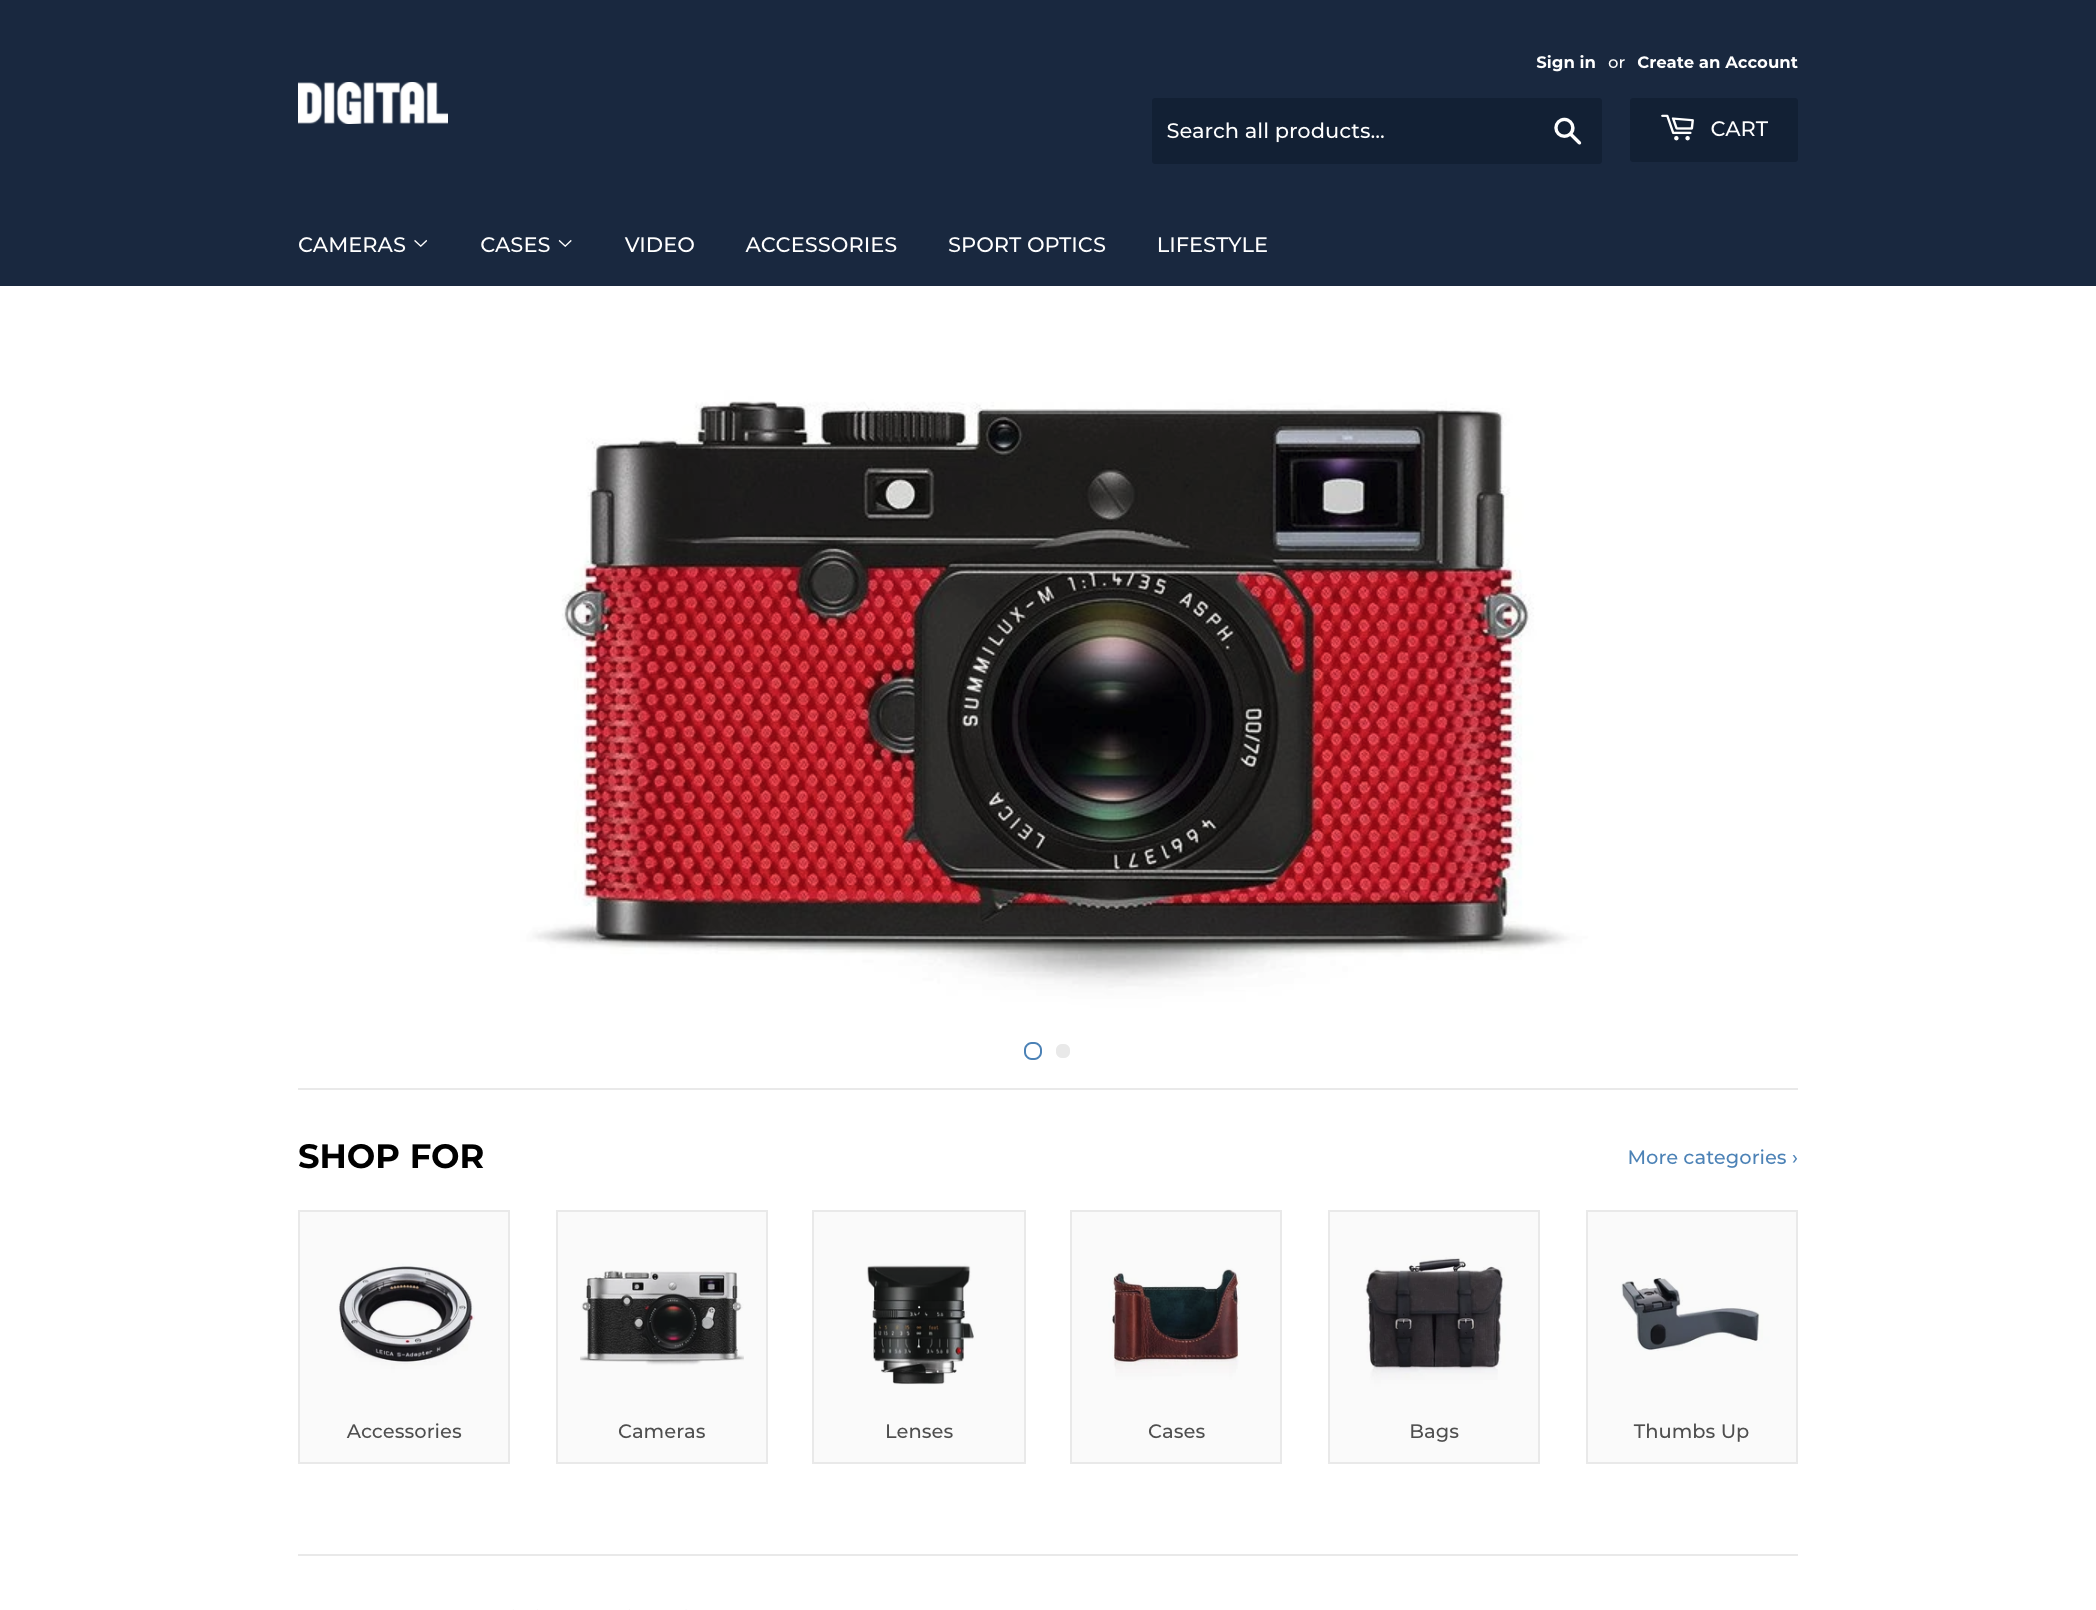
Just like a well-designed website, the right theme can really make or break your eCommerce experience. It’s not as hard to build a Shopify store with our help! In this section, we’ll walk through creating an online shop from scratch using Debut theme fonts and templates only.
We’ll be using a concept brand called Standout Tribes as an example, but the steps will be the same no matter what your brand is. So let’s get started!
1. Pick your domain name
When choosing a domain name, try to keep it short, memorable, and relevant to your brand. You can buy a domain name directly through Shopify or use a domain name that you already own.
If you’re using a pre-existing domain name, you’ll need to point it to your Shopify store. This process can vary depending on where you purchased your domain name, but Shopify has instructions for the most popular domain name providers.
For Standout Tribe, we purchased the domain from GoDaddy, the domain name is www.standouttribes.com
2. Choose a theme
Shopify has a wide range of both free and paid themes to choose from. You can use the Shopify Theme Store to find the perfect theme for your store.
When choosing a theme, keep in mind that you can always change your theme later if you want to. So don’t spend too much time on this step and just choose a theme that you like for now.
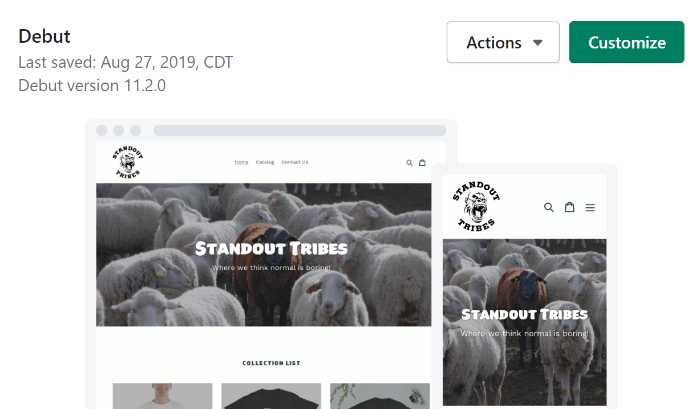
For Standout Tribe, we chose the Debut theme to get started since the Debut theme is perfect for businesses targeting the fashion industry.
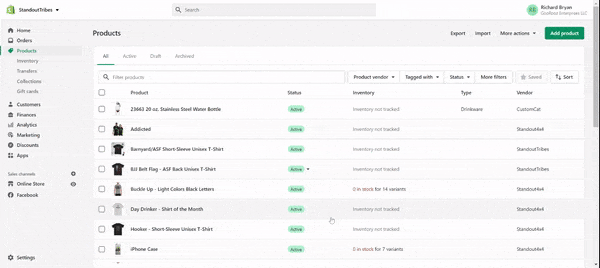
3. Add your products
Now it’s time to add your products! If you’re just starting out, you might only have a few products to add. Or if you already have an existing business, you might have a lot of products to add. Either way, Shopify makes it easy to add and manage your products.
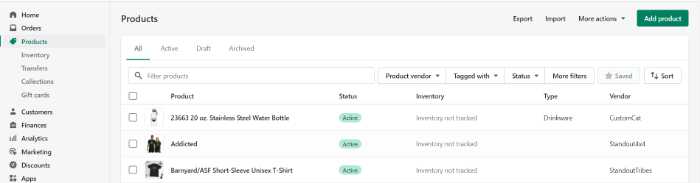
To add a product, go to the Products tab in your Shopify admin and click on Add product.
Once you’ve clicked on Add Product button, you will be required to provide the following:
- Description
- Media
- Cost per item
- Inventory
- Quantity
- Location
- Shipping
- Options (Variations of your product)
- SEO
In order to create a compelling product, you will need to provide relevant and interesting information. This info should be carefully considered, as it will be integral in convincing your audience to invest in your product.
4. Customize your store
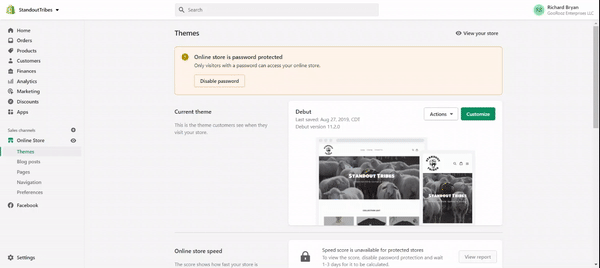
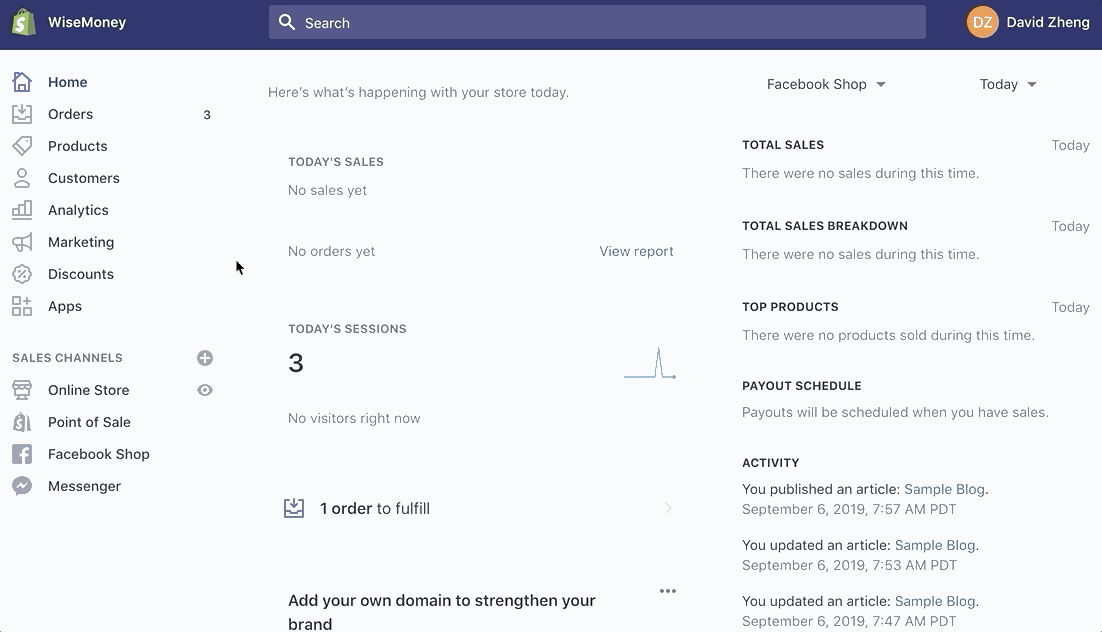
Once you’ve added the products, let’s go back to customizing your store. In Online Store, click Themes then Customize on your main theme.
This should be how your theme editor should look:
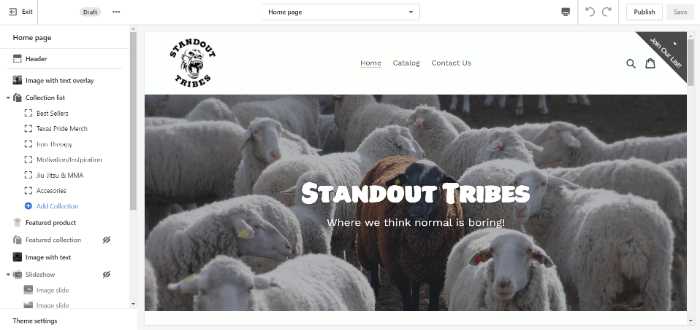
You can customize your theme through the tab on the left side. Each theme has its own option for customizing the following:
• Header
• Collection List
• Slideshow
• Footer
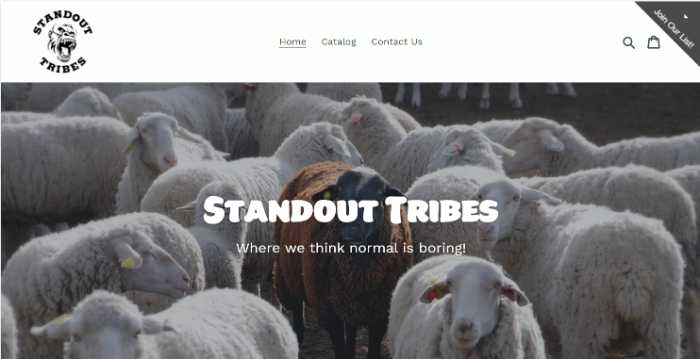
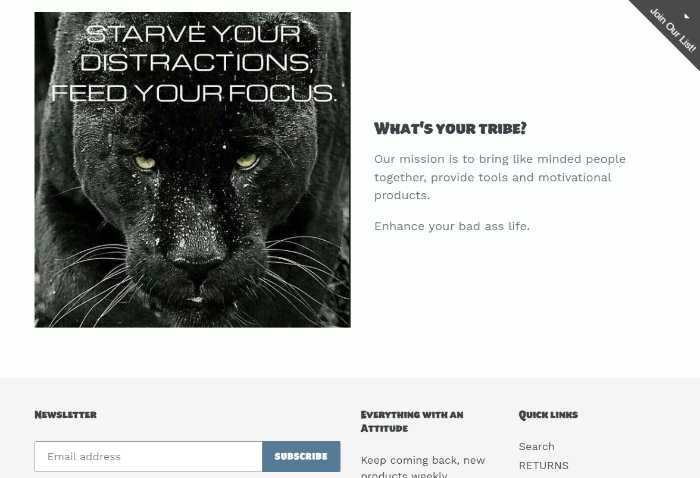
For Standout Tribe, this is how we customized each element:
- Header: We placed the logo on the upper left side, then added three links for the navigation menu. Then we also added an image with a text overlay.
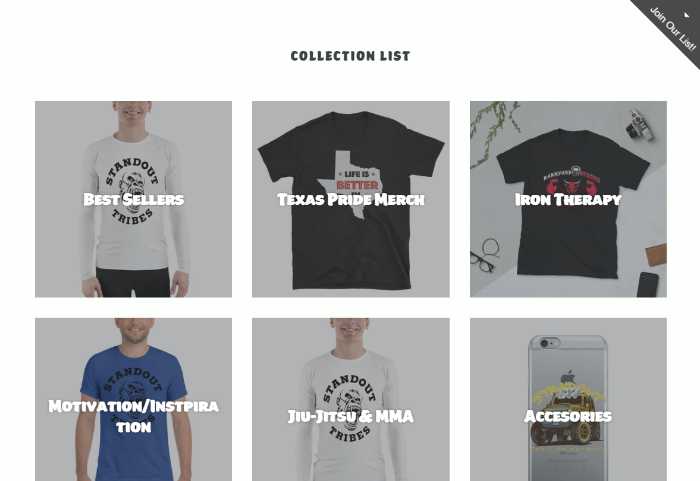
- Collection List: We presented a basic design for the collection to emphasize more on the products, rather than the design.
- Footer: We understand how important it is for companies to have a mission. Ours is to help businesses grow and succeed. Therefore, we added the company’s mission to our site. We also want to encourage people to subscribe to our newsletter so they can stay up-to-date on our latest offerings.
5. Set up shipping
Congratulations! You’ve just finished customizing your store, adding products to it, and setting up shipping. Now you can move on in the process by filling out some basic information under “Shipping” on the Settings page.
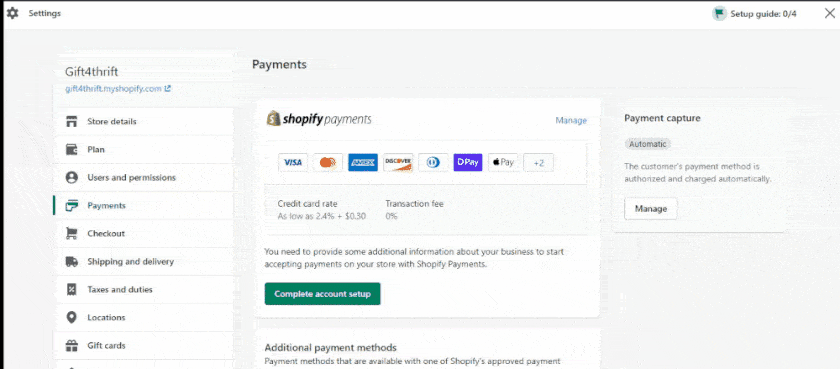
6. Choose a payment gateway
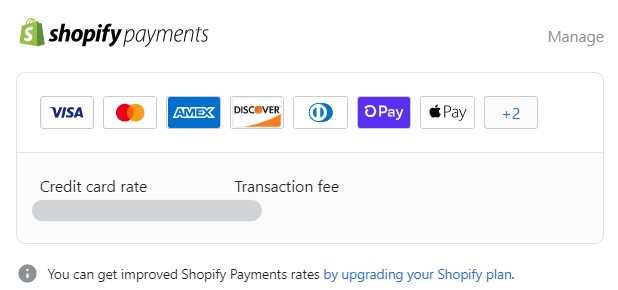
When picking a payment gateway for Standout Tribes, we ended up choosing PayPal as our main payment gateway because it was the easiest to set up and the most cost-effective. Plus, it’s a widely accepted payment channel. Standout Tribes also accept payments from Visa, Mastercard, Amex, Discover, Diners Club, Shop Pay, Apple Pay, Google Pay, and Facebook Pay.
7. Configure taxes
In Settings, you can configure your taxes. Under “Taxes and Duties”, you can select how you want to be taxed. Choose between different options to make sure you’re getting the most out of your taxes. You will also have to manually input the taxes for each country.
8. Set up your customer accounts
There are two options for customer accounts:
a) Customers can create an account during checkout (recommended)
b) Automatic creation of customer accounts for all orders
Customer accounts can be created during checkout if you wish but automatic creation is preferred as it ensures that all orders receive an account.
The first option may seem like a good idea because setting up customer relations properly could take time and effort away from other tasks however the reality of running any business tomorrow means we must focus our energy where there’s most certainly growth potential – on delivering great experiences today instead.
9. Install apps from the Shopify App Store
Make shopping experience and order fulfillment easier for both customers and you by integrating third-party apps. Standout Tribe integrates with a variety of apps to make managing your online presence easier than ever. Here are some of the main app integrations we have:
- Customcat – Print on Demand
- Oberlo
- Printful: Print on Demand
- Privy: Popup Emails & SMS
10. SEO your Shopify store
It’s time to make your store visible to potential customers. The best way to do this is by optimizing your store for search engines (SEO).
You can start optimizing your website by conducting keyword research. Once you have finished your keyword research, apply these keywords that are relevant to each content of your website (homepage, product description, blog posts, and other pages).
With Standout Tribes, we optimized each content with the relevant keyword phrases to our products and blog posts. We’ve also ensured that our contents are not too short and not too long.
Building with The Most Popular Themes
We all know that the Debut theme is a great choice for starting your Shopify store, but what if you want to build an online shopping experience on another one? Don’t worry! We’ve got this section covered. Here we’ll discuss how different processes work when using other themes like Boundless or whatever else floats your boat.
Brooklyn Theme
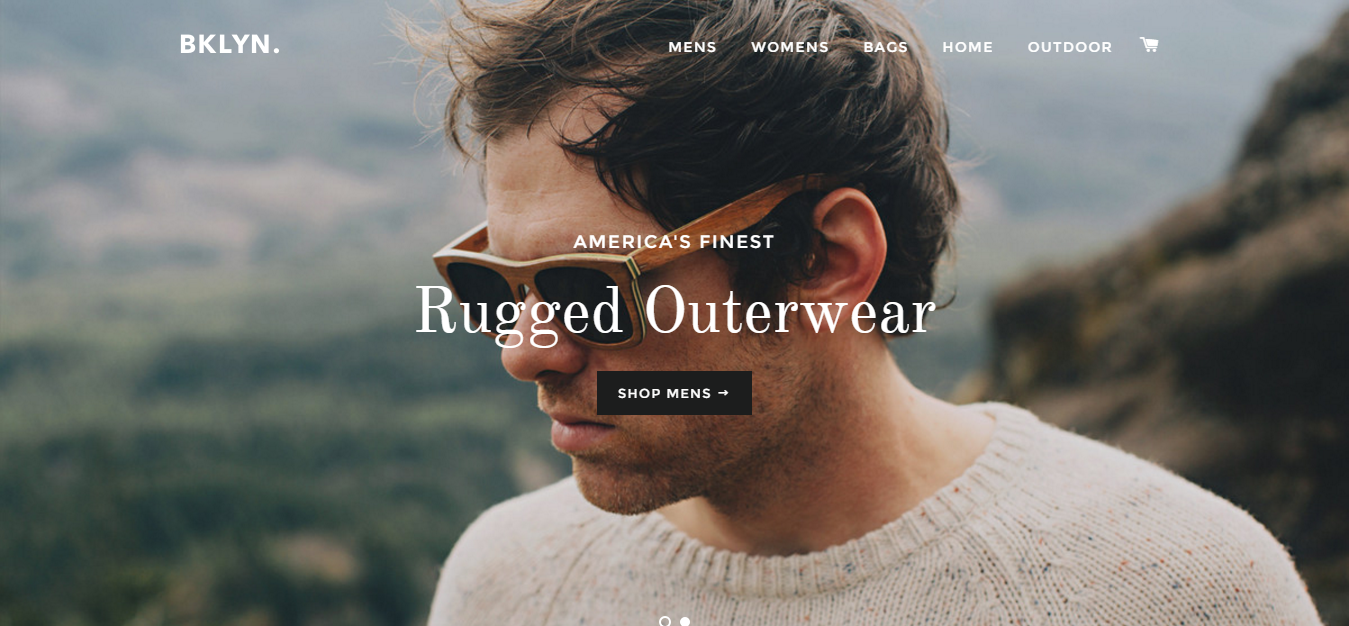
The Brooklyn theme is the perfect match for any apparel store. This stylish and modern design will guide you through creating your own space with this beautiful, coastal-inspired look!
Here are the steps for creating a website with a Brooklyn theme:
- Add creatives for the header
Optimize your website by first making the header attractive enough for the visitors. The header is the very first thing that your visitors see so make sure to make it simple, creative, and include the essential information about your business.
- Include logo
In the Brooklyn theme, your logo should be placed aligned with the navigation bar. You can position it in the left or middle depending on your preferences. Ensure that your logo is high quality and in a .png file.
- Include announcement bar (optional)
Brooklyn theme gives you an option to include an announcement bar at the top of your navigation bar. If you will use the announcement bar, make sure that the layout corresponds to your main background theme.
- Finalize navigation menu
You can add or remove menus in your navigation bar with a Brooklyn theme. Finalize what you want your menu bar to look like.
- Customize typography and background theme
In the settings menu in the theme editor, you can adjust the typography, colors, and overall background theme of your store. Be consistent with your theme.
- Create categories list
Once you have finalized your theme and added products, you can easily create the categories list. The Brooklyn theme has a default layout for the product categories already, so it will be easier for you to finalize the category section.
- Create a featured collection list
The difference between categories and featured collections is that the category list consists of all your main product types. While the featured collection is based on your preferred products to highlight.
- Customize footer section
In the last part of your homepage in the footer, you can add different site links and newsletter subscription information in this section.
Boundless Theme
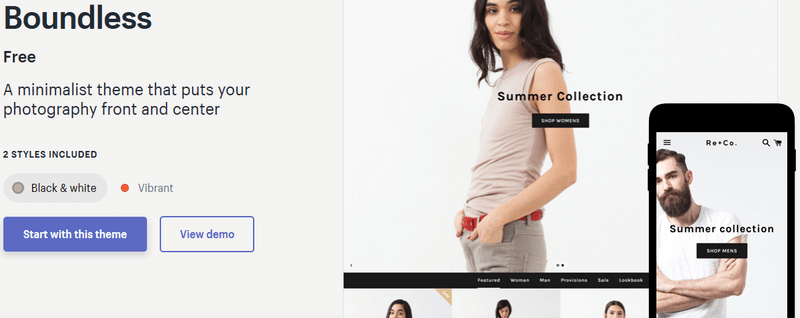
The boundless theme is a minimalist layout for eCommerce websites that are focused on photography and creatives. It has 2 theme layout options, black & white and Vibrant.
Here are the steps for creating a website with a boundless theme:
- Add your logo
There is a default logo included in the boundless theme so you could easily visualize how your website will look. You can easily replace this with your own logo.
- Replace the default header images with your own asset
Similar to the logo, there is a default image included in the header as a recommendation for the new images to add. Make sure your image is quality-optimized and minimalist since the boundless theme is all about minimalism.
- Finalize navigation menu
The navigation menu of the boundless theme is placed below the header and above the collection list. Since this theme is all about creative minimalist design, it is recommended to make your navigation menu as short as possible.
- Customize collection list
In the default collection menu, each product is in portrait orientation with corresponding images of the product. Make sure that the background and subject orientation for each of your products are consistent.
- Finalize Footer Section
You can add the relevant information about your business, add other site maps, and newsletter subscriptions in the footer.
Supply Theme
The supply theme is a free theme in Shopify. This theme is dedicated to ecommerce websites with large inventories. Since the Supply theme is for businesses with large inventories, this is a product-centered theme.
Here are the steps for creating a website with a boundless theme:
- Finalize your header section
Add your logo in the header section of the supply theme, you can adjust the dimensions of your logo here as well. You will also need to finalize your navigation menu in the header section; compared to other themes, the supply theme has a built-in dropdown feature for your navigation menu.
- Optimize your slideshow
The supply theme has a default slideshow section where you can show 3 or more images that switches automatically. You can use this slideshow to emphasize the features or benefits of your products.
- Create your collection list
The collection list for the supply theme is unique, you can add many collection lists as you like with flexibility in customization for each collection list. You can customize how many products for each row and how many rows you prefer.
- Add rich-text
You can use the rich text to promote other information about your company. You can also use this section to provide other relevant information about your products, or if you have any offers or upcoming events.
- Finalize your footer section
Similar to other themes, you can use this section to promote your other products or services, links directly to other pages, and newsletter subscription.
How Does Shopify Shipping Work?
Shopify’s shipping method is determined by your location and the products you are selling. If you’re located in the United States, you can use Shopify Shipping to calculate and print shipping labels for USPS, UPS, or FedEx.
If you’re located outside of the United States, you can use Shopify Shipping to calculate and print shipping labels for DHL Express. You can also connect your Shopify store to a third-party shipping app, such as Shipstation or ShippingEasy, to get access to more shipping options.
In the settings section, you can set up the shipping zones, rates, and methods that you want to offer your customers. But you can also set up specific shipping options in the products section for each individual product.
When you’re setting up shipping in the products section, you can specify whether the product is a physical or digital good, and whether it’s taxable or not. You can also set up delivery dates and shipping restrictions for each product.
If you want to offer free shipping, you can do that in the shipping section of your Shopify settings. There are two ways to offer free shipping:
- You can set a free shipping threshold, which is the minimum amount that a customer has to spend in order to get free shipping.
- You can offer free shipping on specific products or product collections.
What is Shopify Dropshipping?

In the past few years, there’s been an increase in e-commerce retailers that are using the dropshipping model. Dropshipping is a type of e-commerce business model where you sell products that are shipped directly from the supplier to the customer.
The biggest advantage of dropshipping is that you don’t need to carry any inventory. This means that you can start an e-commerce store with very little up-front investment.
Another advantage of dropshipping is that it’s relatively easy to get started. You don’t need to worry about things like manufacturing, packaging, or shipping logistics.
How Does Shopify Dropshipping Work?
The typical dropshipping setup involves three parties:
1. The retailer (that’s you)
2. The supplier
3. The customer
As the retailer, your job is to find suppliers who are willing to dropship their products and then create an e-commerce store to sell those products.
When a customer places an order in your store, you will then place the same order with the supplier. The supplier will ship the product directly to the customer’s door.
One of the challenges of dropshipping is finding reliable suppliers who can provide good quality products and excellent customer service. It’s also important to find suppliers who are willing to work with small retailers.
With Shopify, you can use third-party apps such as Oberlo to find suppliers and add products to your store. Oberlo is a marketplace that connects retailers with dropshipping suppliers.
You can also use Shopify’s built-in supplier directory to find dropshipping suppliers. To access the supplier directory, go to the “Products” section of your Shopify admin and click on the “Add Products” button. Then, click on the “Find Products” tab and select “Dropshipping” from the product type filter.
How Does Shopify Payments Work?
Shopify Payments is Shopify’s own payment processing service. It’s available in the United States, Canada, Australia, New Zealand, Singapore, Ireland, and the United Kingdom.
If you’re using Shopify Payments, then you don’t need to set up a third-party payment processor. This makes it very easy to get started with Shopify. You can sign up for a Shopify account and start accepting payments right away.
Shopify Payments is integrated with Shopify’s checkout process. This means that you can accept credit card payments without having to redirect your customers to a third-party website.
When you’re using Shopify Payments, you’ll pay transaction fees. The transaction fee is 2% for businesses in the United States, Canada, and Australia. For businesses in New Zealand, Singapore, Ireland, and the United Kingdom, the transaction fee is 3%.
Selling on Facebook With Shopify
Shopify offers a Facebook sales channel that makes it easy to sell your products on Facebook. The Facebook sales channel is an app that you can add to your Shopify store.
Once the app is installed, you can create a shop on Facebook and start selling your products. The Facebook sales channel lets you sync your product catalog with your Facebook shop.
You can also use the Facebook sales channel to create ads for your products and track the performance of those ads. The Facebook sales channel is a great way to reach more potential customers and grow your business.
Selling on Facebook Messenger with Shopify
Shopify also offers a Messenger sales channel that lets you sell your products on Facebook Messenger. The Messenger sales channel is an app that you can add to your Shopify store.
Once the messenger third-party app is installed, you can start selling your products on Facebook Messenger. The Messenger sales channel lets you sync your product catalog with your Messenger shop.
You can also use the Messenger sales channel to create ads for your products and track the performance of those ads. The Messenger sales channel is a great way to reach more potential customers and grow your business.
Selling on Instagram With Shopify
Instagram is a visual social media platform with over 800 million active users. It’s a great place to connect with potential customers and sell your products.
Shopify offers an Instagram sales channel that makes it easy to sell your products on Instagram. The Instagram sales channel is an app that you can add to your Shopify store.
Once the app is installed, you can start selling your products on Instagram. The Instagram sales channel lets you sync your product catalog with your Instagram account. You can also use the Instagram sales channel to create ads for your products and track the performance of those ads.
The Instagram sales channel is a great way to reach more potential customers and grow your business.
Integrating Shopify with Amazon
Shopify offers an Amazon sales channel that makes it easy to sell your products on Amazon. The Amazon sales channel is an app that you can add to your Shopify store.
Once the app is installed, you can start selling your products on Amazon. The Amazon sales channel lets you sync your product catalog with your Amazon account. You can also use the Amazon sales channel to create ads for your products and track the performance of those ads.
The Amazon sales channel is a great way to reach more potential customers and grow your business.
Ecommerce Website Comparison
Shopify vs Bigcommerce
Shopify and Bigcommerce are two of the most popular eCommerce platforms on the market. They’re both great choices for businesses that want to sell online. But which one is the best?
To help you decide, we’ve put together an eCommerce comparison of Shopify vs Bigcommerce. We’ll compare features, prices, and more to help you decide which platform is right for your business.
Shopify is a leading eCommerce platform with plenty of features and tools to help businesses grow. It’s easy to use and has a wide range of apps and integrations to choose from.
With Bigcommerce’s easy-to-use software and wide range of apps, your business can easily grow. It offers many features which make it great for any type or size company looking to take their online presence up a notch!
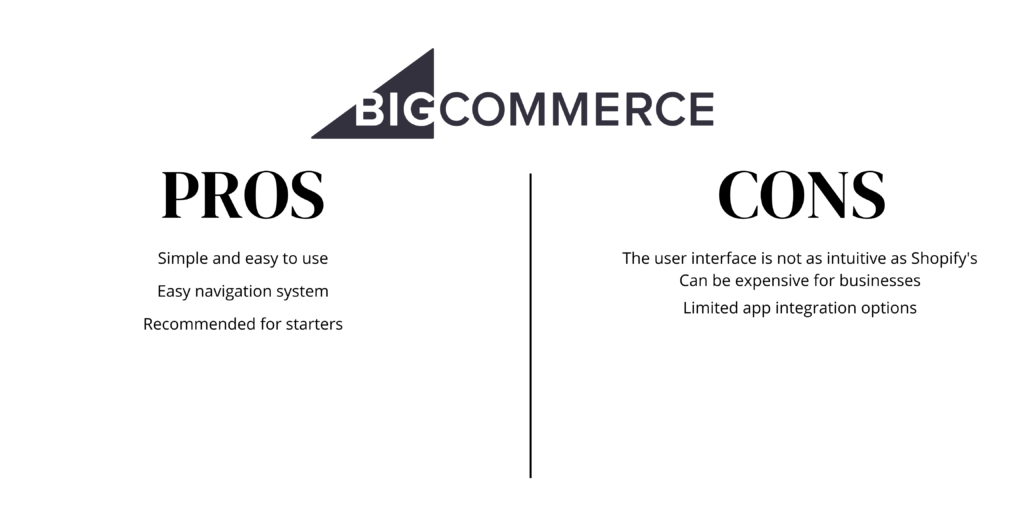
Both Shopify and Bigcommerce are great choices for businesses that want to sell online. They both offer plenty of features and tools to help businesses grow. However, Shopify is a better choice for businesses that want an easy-to-use platform with a wide range of features and integrations. Bigcommerce is a good choice for businesses that are on a budget and want an easy-to-use platform with a simple navigation system.
Shopify vs Woocommerce
Shopify and Woocommerce are two of the most popular eCommerce platforms on the market. They’re both great choices for businesses that want to sell online. But which one is the best?
To help you decide, we’ve put together an eCommerce comparison of Shopify vs Woocommerce. We’ll compare features, prices, and more to help you decide which platform is right for your business.
Shopify is a powerful eCommerce platform that offers tools and features to help your business grow. It’s easy to use, with plenty of apps for all types of businesses on the market today.

Woocommerce is a popular eCommerce platform that offers plenty of features and tools to help businesses grow. It’s easy to use and has a wide range of plugins to choose from.
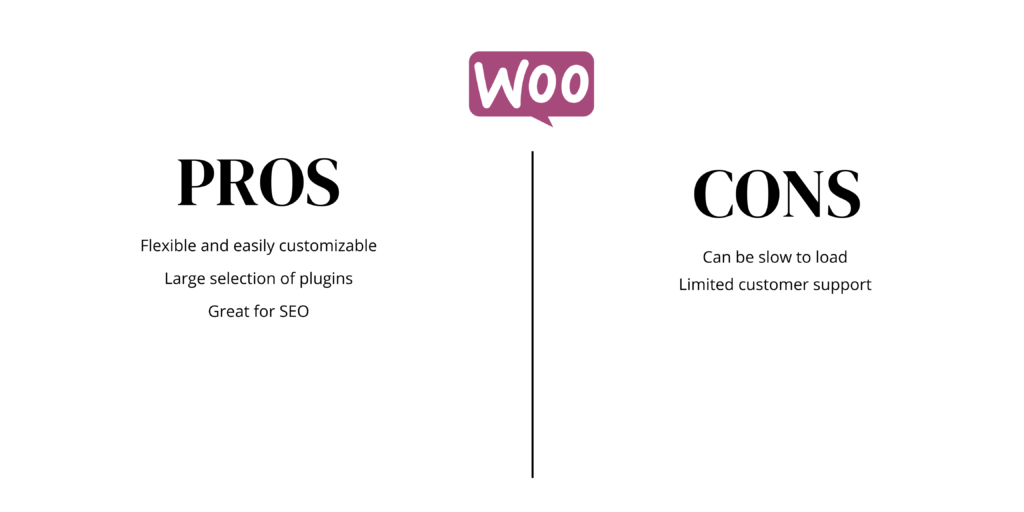
Both Shopify and Woocommerce are great choices for businesses that want to sell online. They both offer plenty of features and tools to help businesses grow.
Shopify vs WordPress
Shopify and WordPress are two of the most popular eCommerce platforms on the market. They’re both great choices for businesses that want to sell online. But which one is the best?
You’re in the right place if you want to start your own eCommerce store. We’ve put together a handy comparison of Shopify vs WordPress so that both will be compared features, prices, and more importantly – what’s best for you as an entrepreneur!
Shopify is a leading eCommerce platform with plenty of features and tools to help businesses grow. It’s easy to use and has a wide range of apps and integrations to choose from.

WordPress is a popular eCommerce platform that offers plenty of features and tools to help businesses grow. It’s easy to use and has a wide range of plugins, themes, and integrations to choose from.

Shopify and WordPress are two of the most popular platforms for businesses looking to sell their goods online. They both offer many features that will help your company grow, such as easy website building tools or marketing campaigns with targeted messages perfectly tailored just right.
Summary
if you’ve completed these 10 steps, you have a fully functioning Shopify store. Keep in mind that there are always ways to improve your store and make it stand out even more. Try experimenting with new apps, integrations, and design elements to find what works best for you and your business.
Now that you know the 10 steps to create a successful Shopify store, what are you waiting for? Go out there and build your dream store today! Goo Rooz can help you with your marketing objectives, contact us today to learn more.